DIY Photography Season by Season - Part 1: How to take great photos of your kids in spring
Are you itching to get out in the sunshine and take great photos of your little ones in the vibrant spring flowers that are appearing everywhere in recent weeks, but worried you won’t be able to capture the perfect shot? Welcome to the first post in my DIY Photography guide.
I’ll be sharing my top tips for taking great photos of your kids in every season – spring flowers, summer sun, autumn leaves and winter landscapes.
Parents are always asking me for advice about how to get the best pictures of their kids – some join me on my Photography for Parents Workshop – so I decided to put together this DIY Photography guide to help you make a start on taking some well-composed, colour coordinated shots yourself. Follow my tips and you won’t have to wait until you can get a session with me to capture those special moments.
Season by season I’ll be guiding you through how to prepare for a shoot, how to get the colour schemes right, and how to set up your shots.
Spring photography is all about colour
As spring has recently sprung that is where we’ll start, and what a refreshing start it is. After the long winter months it’s such a relief to see chinks of sunshine and splashes of colour as the trees turn green and the spring flowers start to bloom.
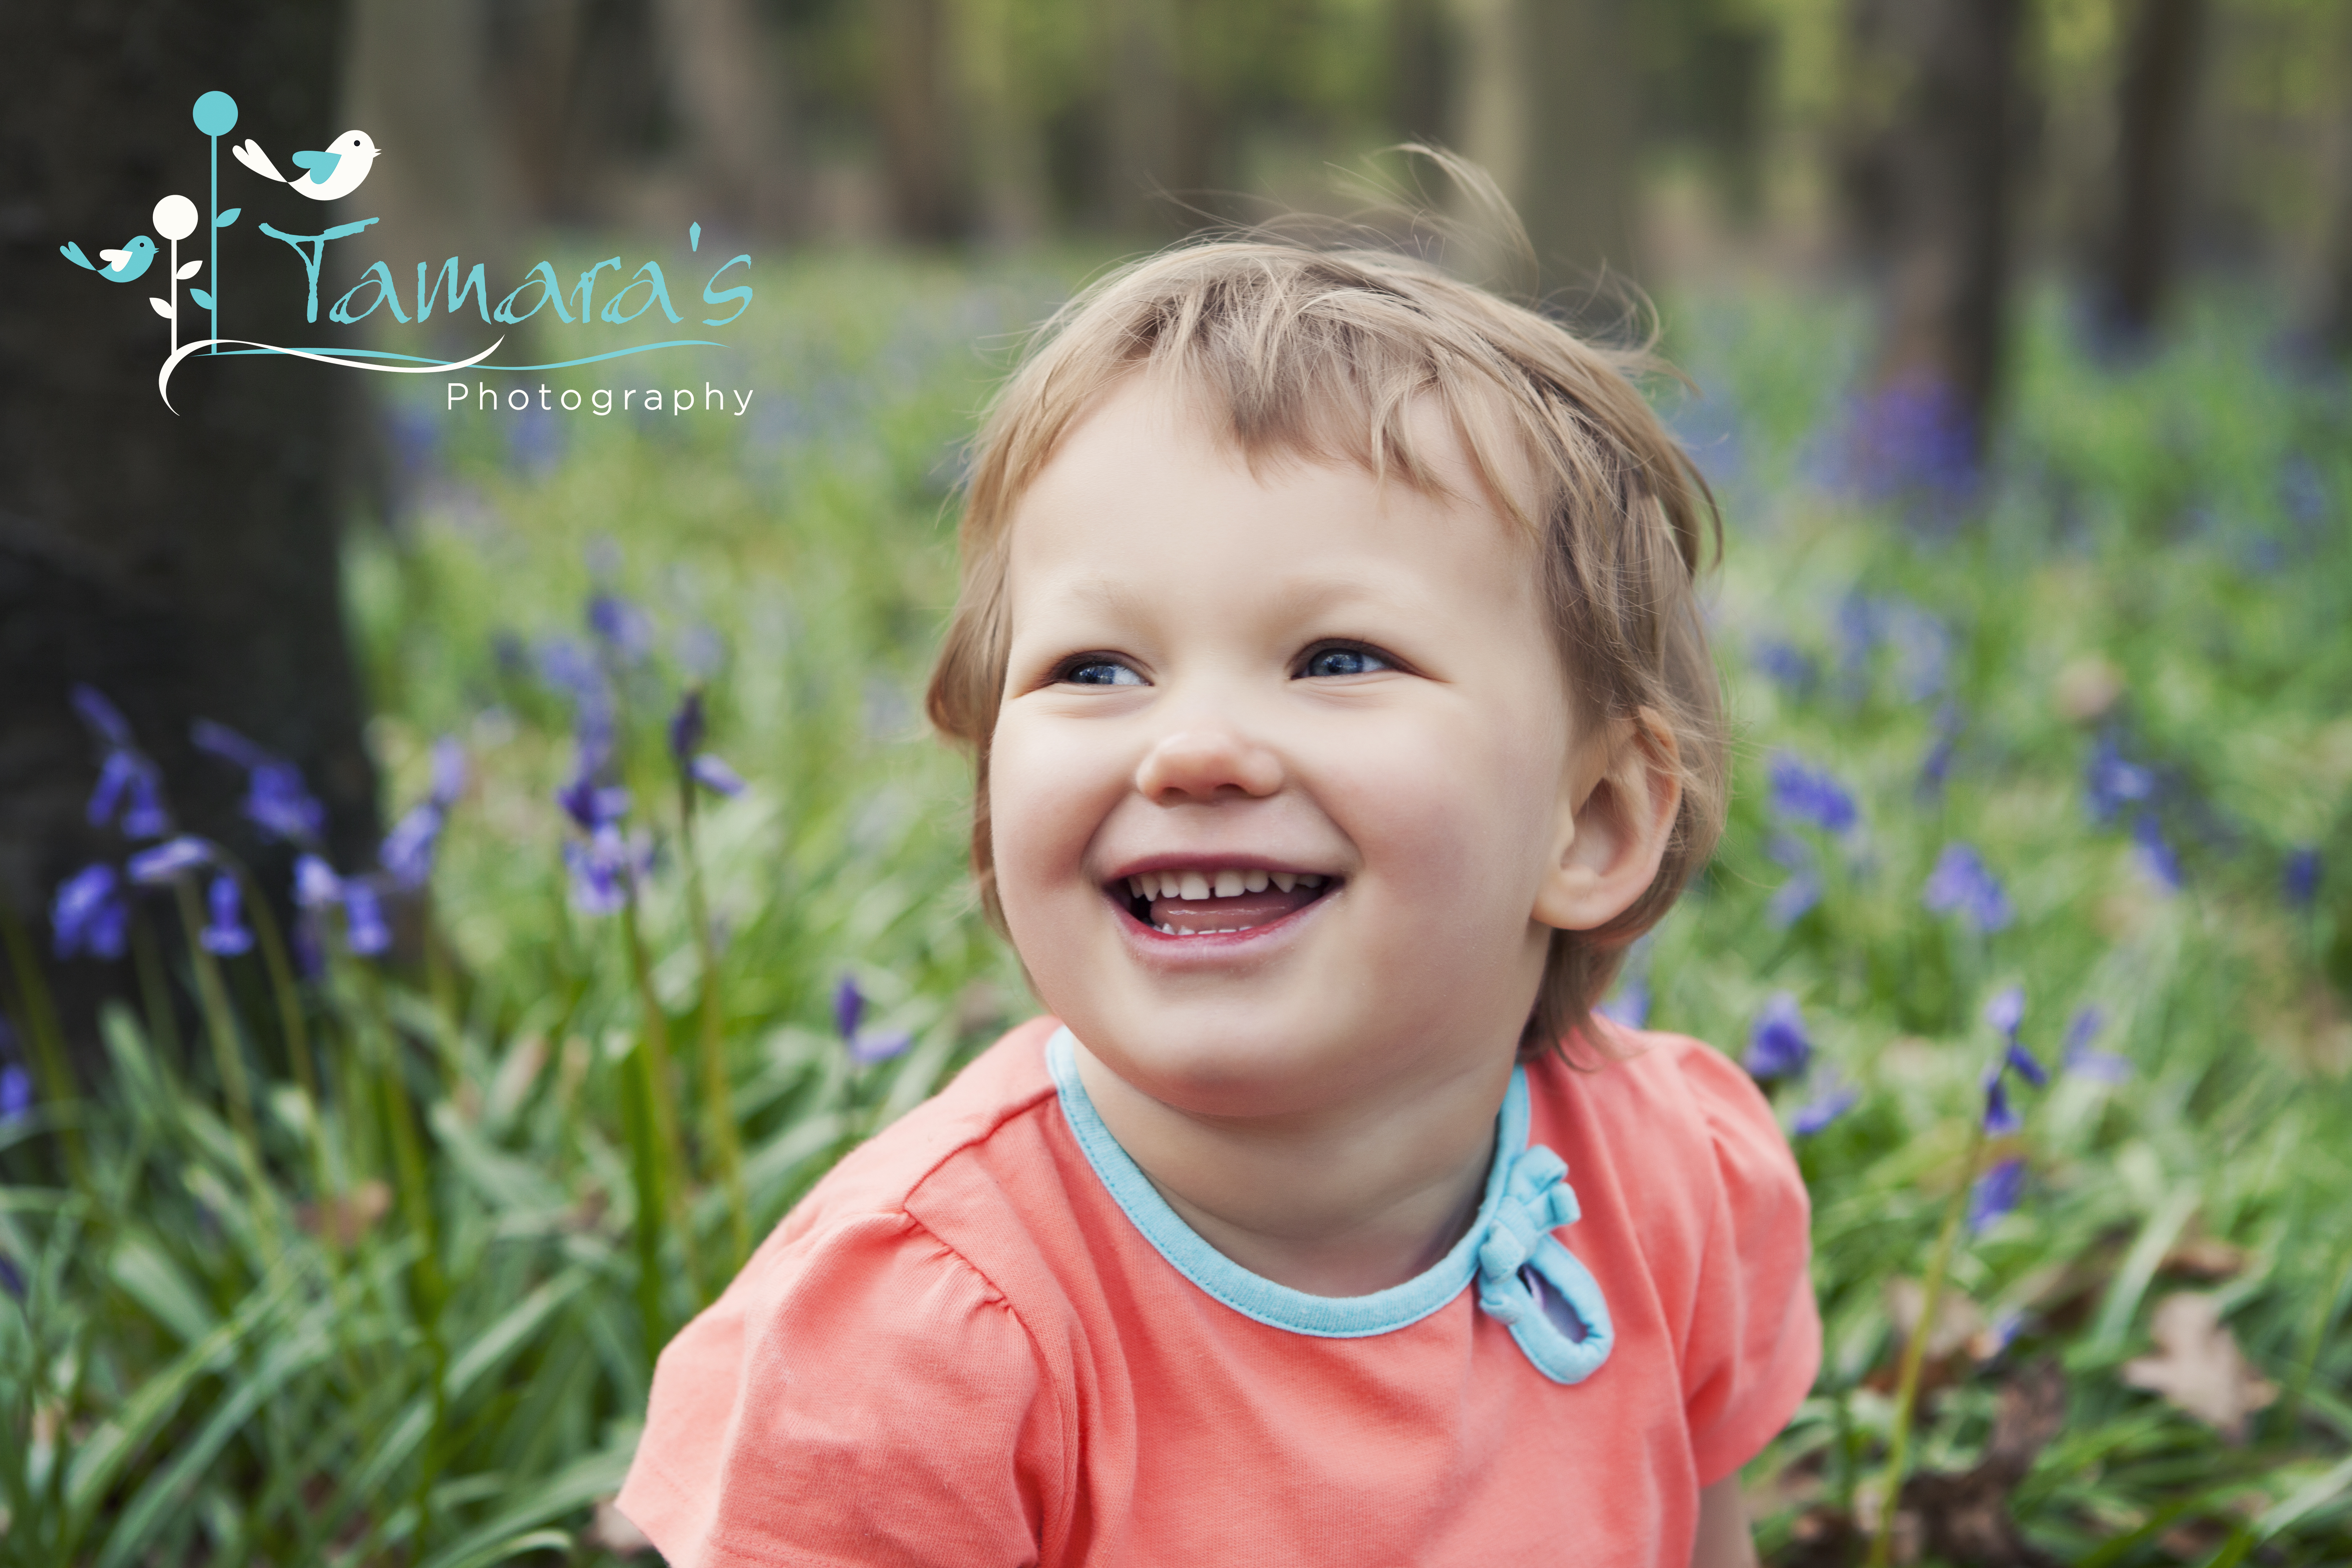
It’s a perfect time to get outside and capture some fresh memories on film – the spring light is softer and more flattering than summer sun, and daffodils, primroses, bluebells, tulips, not to mention all the blossom are breaking through from the darkness and showing off their best colours.
So let’s get started.
What you’ll need.
• You and your camera. I’m assuming that you’re using a digital SLR or bridge camera - not your iPhone!
• Your family (of course).
• Outfits for the kids – more about that later.
• Enough time set aside for a photo session. I’d recommend 20 to 40 minutes. Too short and you’ll be rushing, too long and the kids will have stopped cooperating.
• A location – I’ll share some advice about that below.
• A backpack to keep all your photography kit in. A backpack keeps your hands free while keeping everything you need close at hand.
So let’s get started. Like every good Girl Guide knows you need to...
Be prepared
Yes sometimes you can capture a knock-out shot off the cuff, but there’s a reason those perfectly composed portraits look so great – plenty of preparation went into getting everything right. If you want your kids to look not only happy but also neat, tidy and relaxed you need to put some thought into it ahead of time.
Here’s some things to think about ahead of your shoot:
• Choose a location, and check it out before your shoot so you know where to go and where the best spots are. If you have to wander around too much looking for the best spot the kids will get bored. Do some research to help you find what you’re looking for:
Bluebells: the Great British Gardens website has a list of bluebell woods as does The National Trust who list bluebell woods by region.
Daffodils: Again Great British Gardens can help.
Other spring gardens: visit the National Trust’s site for a list of their ‘Best spring gardens’
• Set aside at least 20 to 40 minutes for the shoot.
• Bring an assistant (your other half, or a friend) - someone who can chase and play peek-a-boo with the kids while you concentrate on capturing the moment.
• Take a prop or two with you to keep the children amused. A basket for them to collect bits and pieces in or even one or two flowers is a great way to help them keep busy while you take some lovely shots.
• Make sure children have slept properly and are fully fed so there is every chance they’ll be on their best behaviour. Have a few snacks, a drink and anything you know will help keep your kids happy close at hand. Word to the wise – keep snacks as a last resort to avert a meltdown, chewing is not a flattering look and your child can’t smile if they have something in their mouth.
• Choose clothing wisely. I’ll discuss this further when I talk about colour schemes later on, but for starters avoid busy patterns, lots of writing or large logos as they distract the eye and when you look back at the images in years to come they can look dated.
Consider your colour scheme
• So staying with the subject of clothing, to take great photos you really need to think about the colour of the outfits you choose. It can make all the difference between so-so pictures and shots that really pop. I recommend using a colour wheel to guide you.

• Lighter colours can work well but try and avoid solid white on bright spring days as the light bounces off it and can make pictures look glary.
• As spring is all about colour I prefer to go with colourful outfits – just makes sure the colours you choose work with the colour of the flowers you’ll be photographing your children in. That’s where the colour wheel comes in.
• Colours that are on the opposite sides of the wheel from each other – complementary colours – work well. An orange shirt in the midst of the bluebells will really stand out.
• I also like to use colours that are next to each other on the colour wheel - analogous colours. Check out the picture of this family with the bluebells.
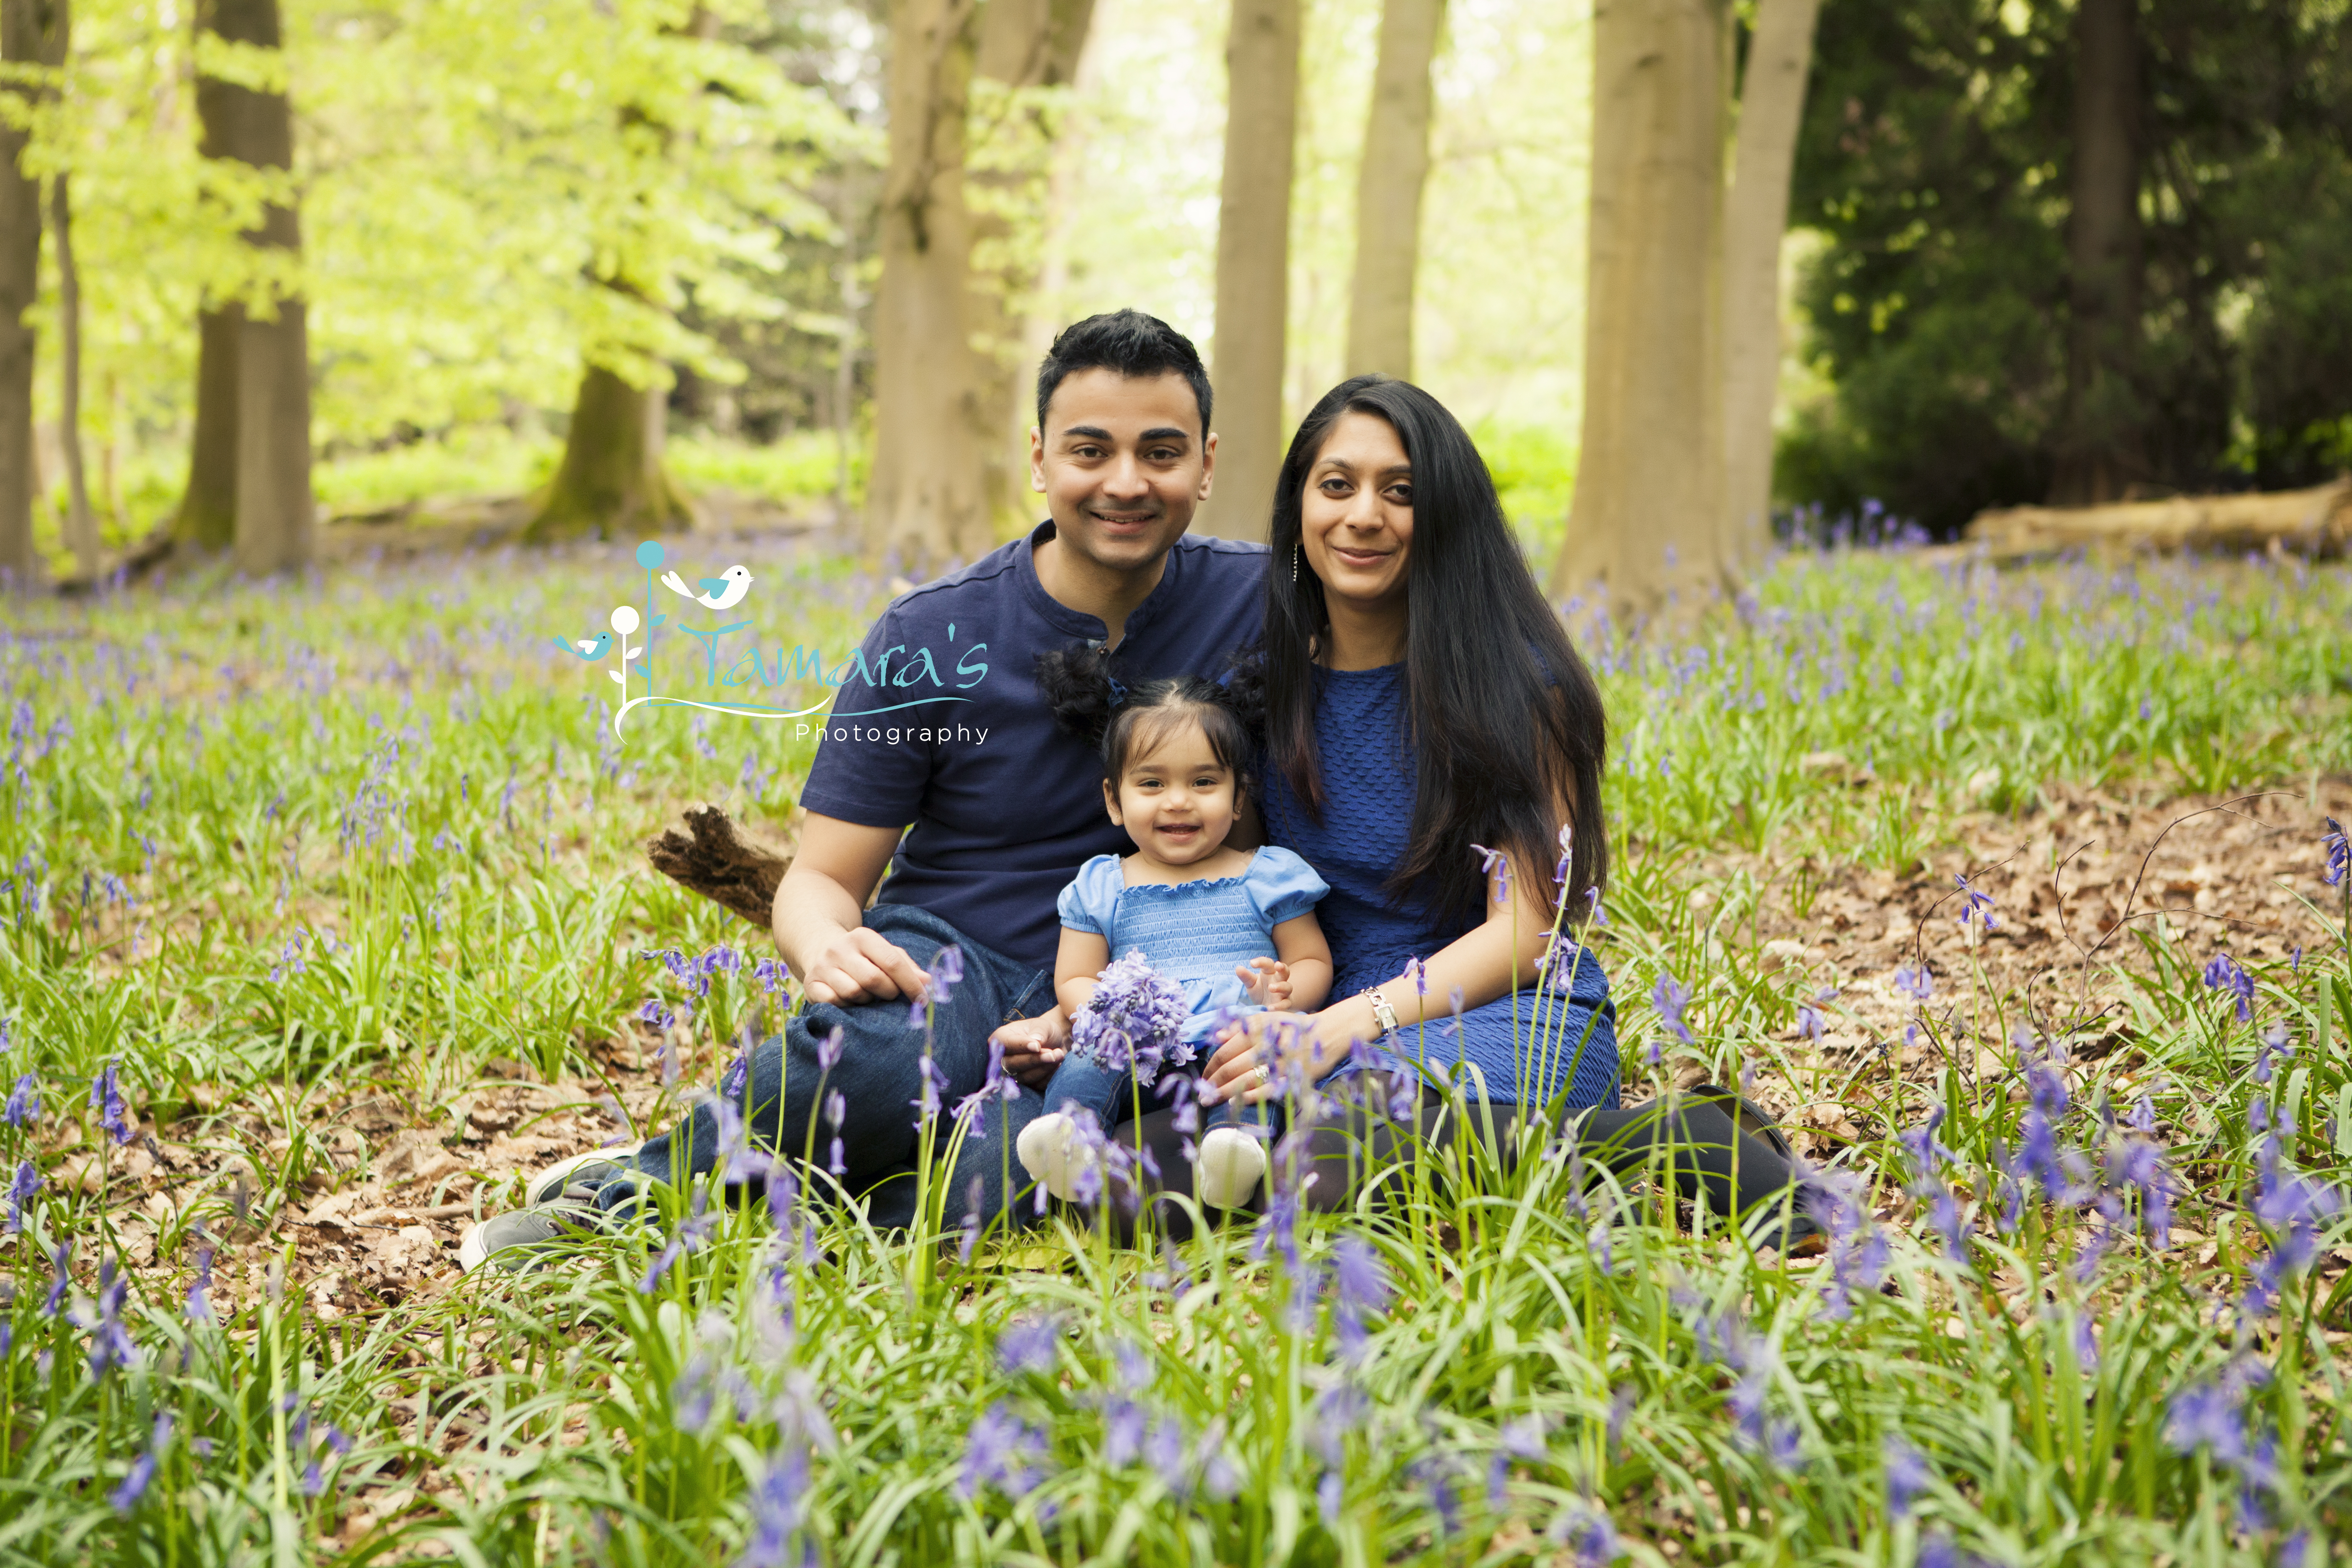
I would say they have almost gone Monochromatic which is using one colour but in different shades. These kind of colour schemes, often found in nature, are harmonious and pleasing to the eye.
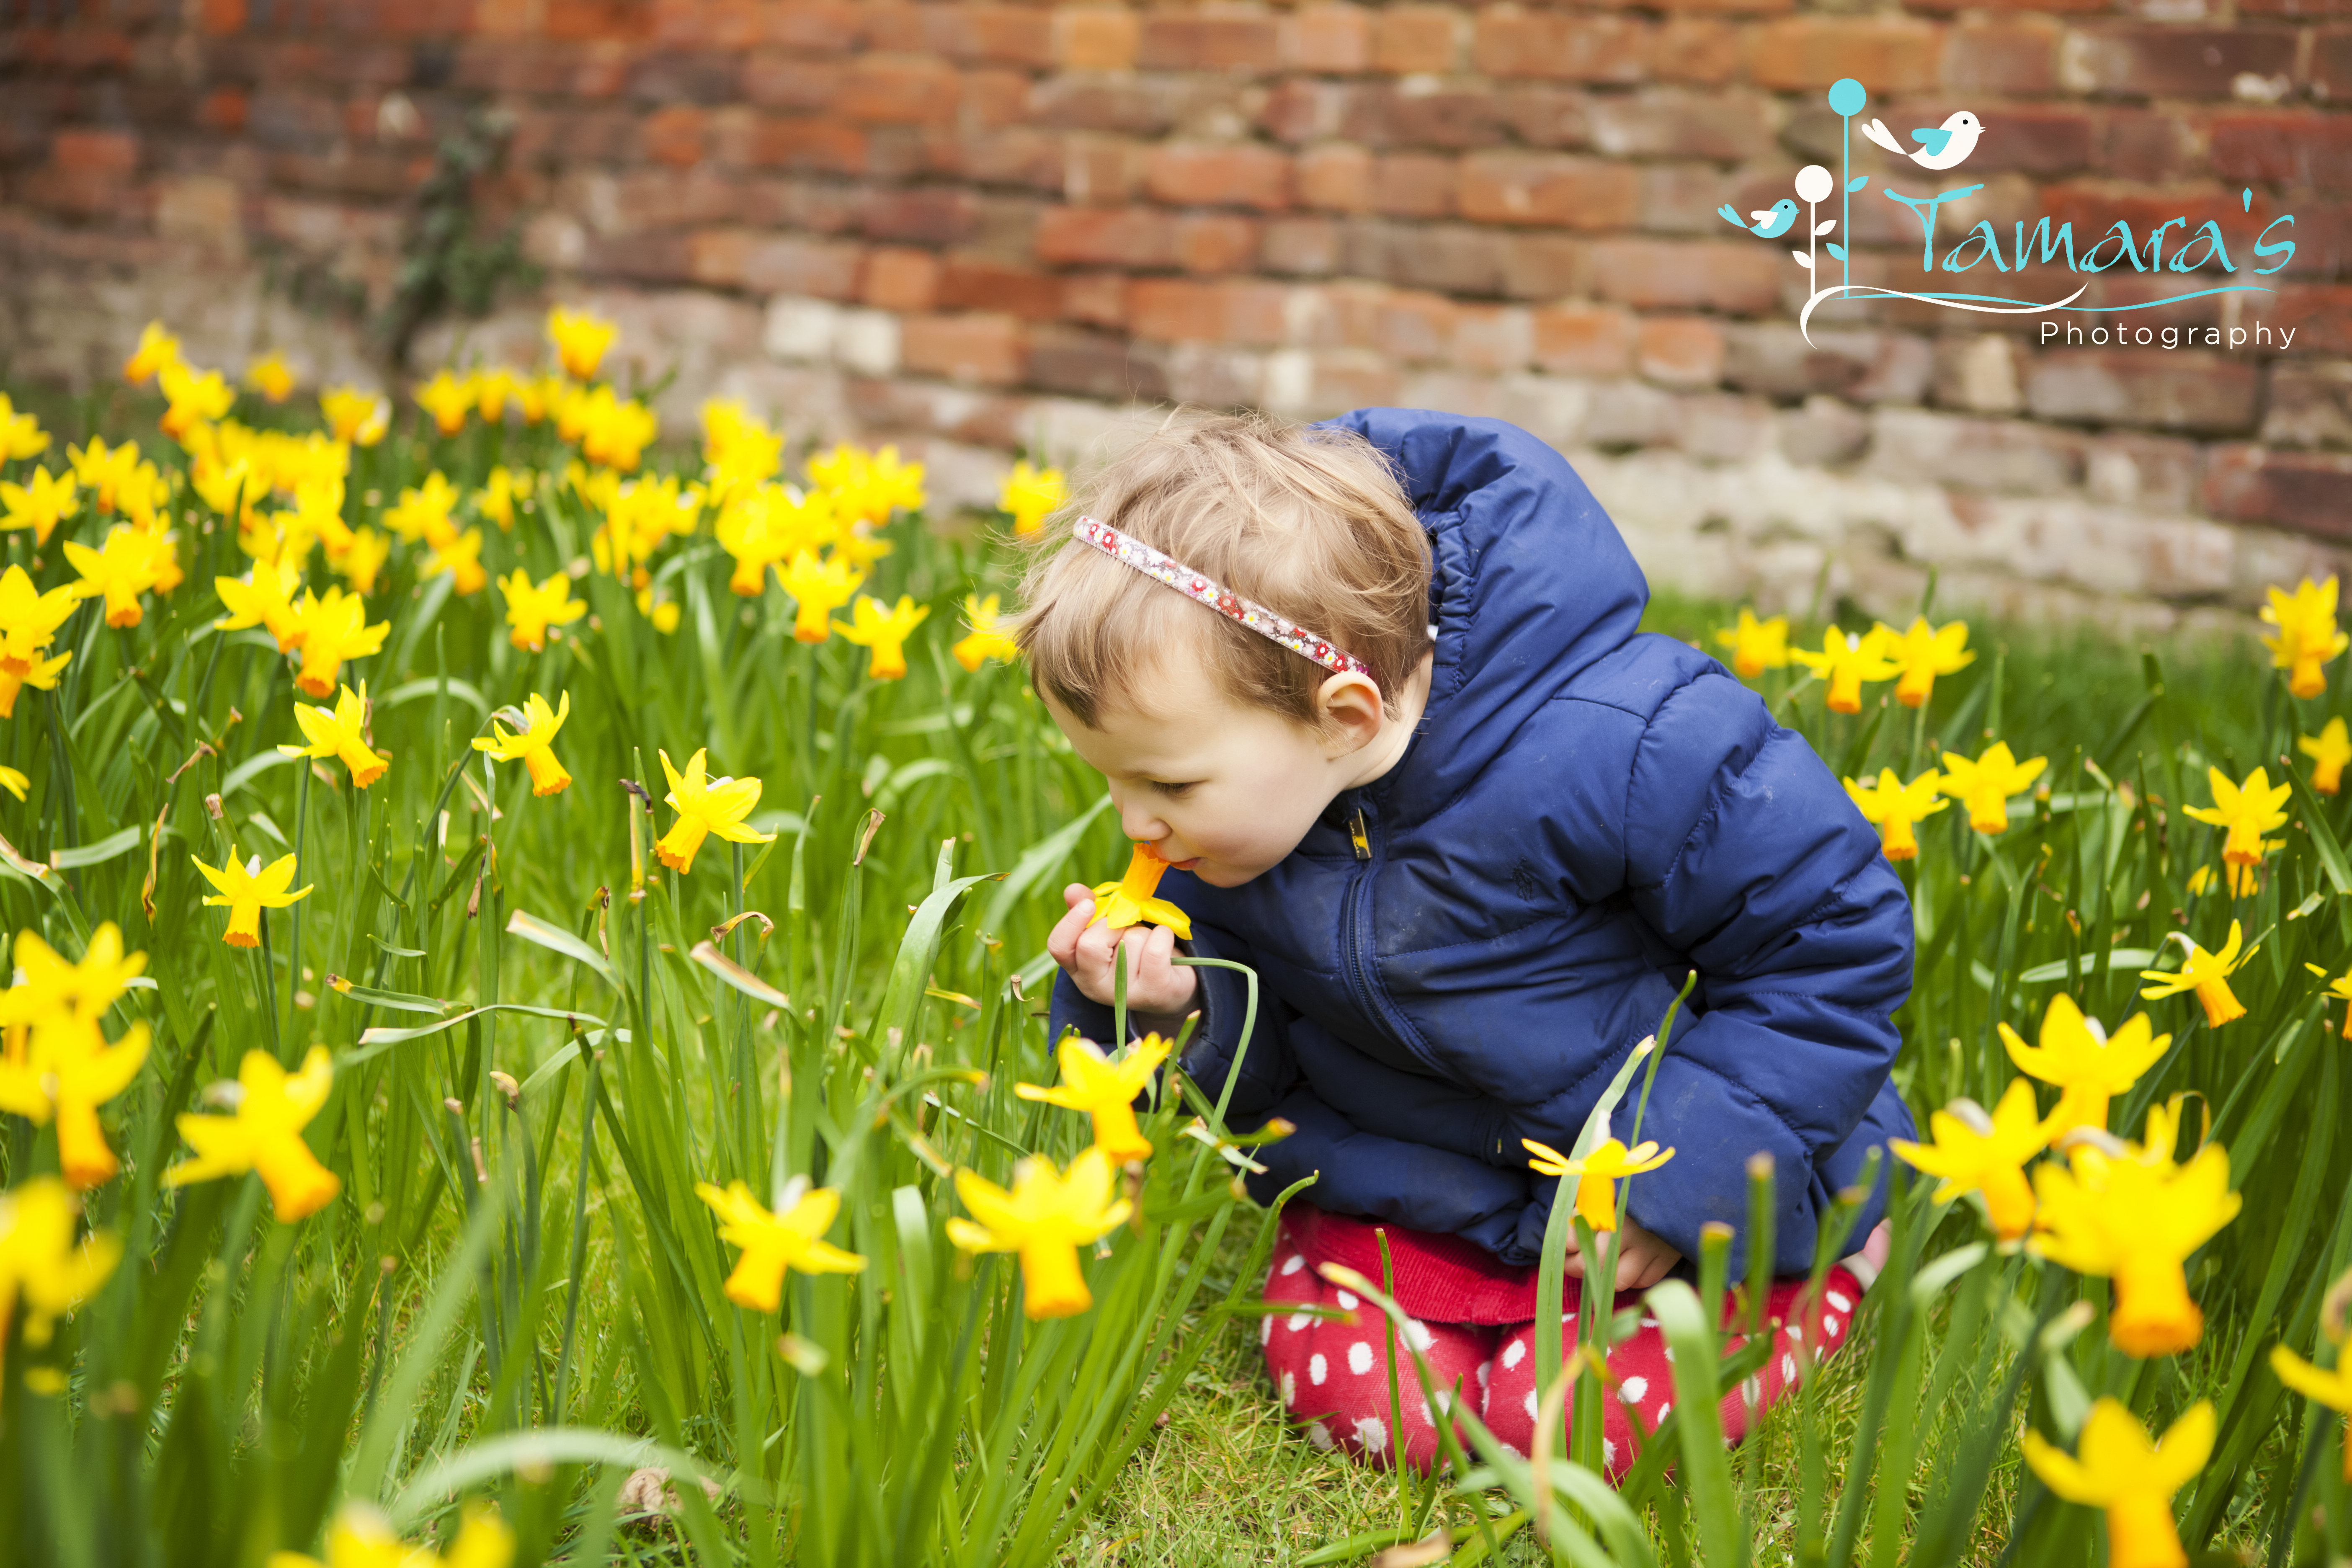
• You could also try using colours that are evenly spaced around the colour wheel – a triadic colour scheme. So for instance I dressed my daughter in blue and red amongst the yellow daffodils.
• Probably the best choice for beginners is the split-complementary colour scheme. Choose your base colour ie. the yellow of the daffodils, identify it’s complementary colour then notice the two colours on either side of it. Those are the colours to dress your children in. This scheme has the same strong visual contrast as the complementary colour scheme, but is gentler on the eye and easier to get right. So in case of the daffodils, I could have gone for red and blue violet colours.
Getting the best shots
So once you’re on location, with your colour scheme all planned out, and your camera ready to go. Here are a few tips for taking that great photo:
• It’s all about the flowers, so find the blooms that are low to the ground, they’ll be level with very little ones who can sit surrounded by colour. Bigger kids can also sit or even lie amongst the them..
• It is easier to test your skills on an overcast day as the light is nice and even. If you happen to go out on a sunny day, make sure you find some spots of shade as bright sunshine does nothing for skin-tones and should be avoided if at all possible. If for some reason you find yourself in an area with no shade make sure the sun is behind your children so they aren’t squinting into it. Use the hood on your camera or your hand to block the sun coming directly into your lens.
• Framing your subject is very important. I will go into this in more detail in my next guide for Summer, but for now just try different things. Put your child in the top right and left corner as well as in the bottom right and left corner of your frame as well as in the middle and see which composition you favour best.
• Take as many shots as you can. The secret to getting plenty of great shots isn’t to stand there waiting for the perfect moment – although if it happens by all means shoot away – but to simply keeping taking frame after frame. Yes you’ll have some less than flattering shots amongst them, we all do, but you’ll also have a better chance of not missing that special moment.
• Help your littles ones create a special moment by giving them little tasks and gentle instructions. For instance ask them to count the flowers in their basket, or to smell one of the flowers. Perhaps they can holds hands, pass a flowers to each other or give each other a cuddle. Pretend the gruffalo’s cave is just behind a tree or bush and ask them to hunt for it, or get them to count the birds in the sky or the squirrels in a tree. You get the idea. Spark their imagination, curiosity and sense of fun. And remember, they don't always have to look straight at the camera. Catch them in the moment!
• Keep moving around your children to get different angles. Hence the need for the backpack I mentioned earlier. If everything you need is on your back you don’t have to keep moving your bag every time you move or change locations.
• If you know your way around your camera, shoot in manual mode or at least aperture priority – abbreviated to A or Av (for aperture value) on a camera mode dial – then you’ll get those lovely softly blurred backgrounds.
• Tips for the camera buffs among you:
o I tend to shoot between F2.8-4 for these types of photos – 4 is more on forgiving on your area of focus and thus great if you are trying to photograph two kiddies. And if you are close to your subject(s) you will still get that lovely blurry background. Ideally your child is sitting amongst the flowers or is collecting items for the basket so won’t be running around too much.
o I still tend to keep my shutter speed at 125 minimum, but may creep up my iso from 100 to 400 if I am photographing bluebells in the forest with less light coming through the trees. I do put my shutter speed up if it is very sunny and I don’t want to change my f-stop from the 2.8-4 range. So I may be shooting at 1/320.
Know when to call it a day
Stick to the time frame you allocated, and call it a day before your little subjects lose patience, then relax and have fun with them afterwards. Hopefully that means that next time you want to take photos they’ll be happy to cooperate.
I hope you found that useful and that you already feel more confident about taking great photos of your kids while you’re out and about this spring. It really is a great time to capture their excitement at being out enjoying the great outdoors, so good luck!
If you are not sure how to use your camera please consider joining join my Photography for Parents Workshop – the next one is happening on Sunday 31st May.
Of course if you really want to make it easy on yourself book me for a mini spring session and let me do all the hard work for you! Be warned, I get my clients out early in the morning from about 9am to get softer light to play with, but it’s worth it.
Join my mailing list to make sure you receive my DIY Photography summer guide.